
iOS7最佳实践--一款天气APP(1)
本章节教程仅供学习使用
英文原版地址:http://www.raywenderlich.com/55384/ios-7-best-practices-part-1,版权归其所有
翻译纯属学习兴趣,对原文也有些删改,如果侵权,请联系我马上删除.
1.首先创建工程:
启动Xcode,依次点击File\New\Project. 选择Application\Empty Application.将你的工程命名为 SimpleWeather , 继续点Next,选择一个目录来存放你的工程,接着点 Create . 你现在已经把基础的工程建立好了,接下来设置第三方工具.但是首先确保你已经关闭了Xcode.以至于不会干扰到接下来的操作.
2. Cocoapods
关于 Cocoapods 的详细介绍,我就不说了.想了解更多的朋友可以点链接进入官网.
启动终端(Terminal),输入下面的命令回车:
which pod假如你看到的输出是下面这样
/usr/bin/pod那么恭喜你,你的电脑上已经安装好了Cocoapods.如果显示的是pod not found ,那么说明你还没有安装好.输入下面的命令进行安装:
$ sudo gem install cocoapods需要了解更多安装的方法,我推荐一篇唐巧大神的文章《使用CocoaPods来做iOS程序的包依赖管理》.
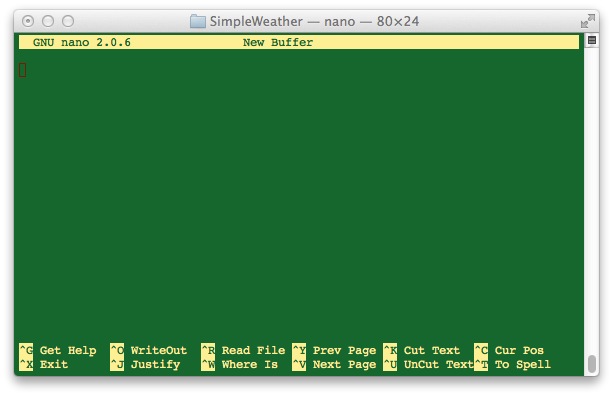
上面已经结束了的童鞋,我们接着往下走,还有其他的pod问题可以留言. 进入工程文件夹后.输入pico
你会看到这样的一个界面
然后粘贴下面的代码进去
platform :ios, '7.0'
pod 'Mantle'
pod 'LBBlurredImage'
pod 'TSMessages'
pod 'ReactiveCocoa'
效果如图:
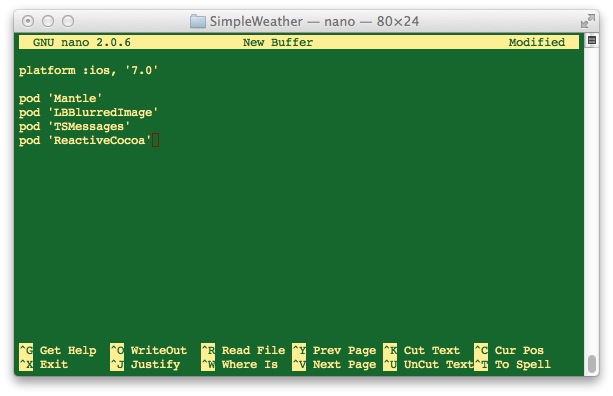
然后Control-O保存,文件命名为: Podfile 后回车.接着Control-X退出来.配置文件就做好了. 然后在开始pod安装了.命令如下:
pod install若有提示权限问题,在命令前面加上sudo:
sudo pod install安装过程会根据你的网速不同,需要的时间也不同…只需要耐心等待…正常的安装成功界面如下:
$ pod install
Analyzing dependencies

CocoaPods 0.28.0 is available.

Downloading dependencies
Installing HexColors (2.2.1)
Installing LBBlurredImage (0.1.0)
Installing Mantle (1.3.1)

Installing ReactiveCocoa (2.1.7)
Installing TSMessages (0.9.4)
Generating Pods project
Integrating client project

[!] From now on use `SimpleWeather.xcworkspace`.
Cocoapods 会创建一些新文件或者文件夹在你的工程目录内.不过你只需要关心SimpleWeather.xcworkspace就可以了.因为从今后开始,打开工程都需要双击SimpleWeather.xcworkspace,而不是SimpleWeather.xcodeproj.
打开工程后会发现多了一个pods工程在你的workspace里面. Pods里面有你导入的每个库,像文件夹一样折叠着.
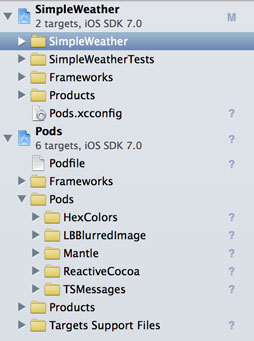
你要确定你当前选择的是SimpleWeather工程,如图:
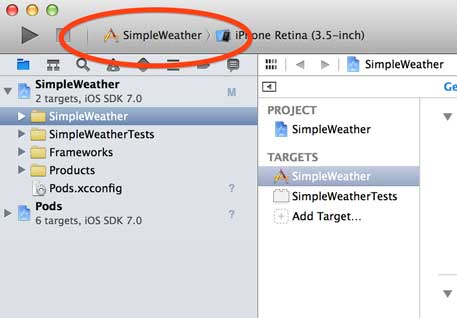
编译且运行下app,看看是否会出现error中断运行.. 编译:command+B 运行:command+R 如果没问题,app运行效果如下:
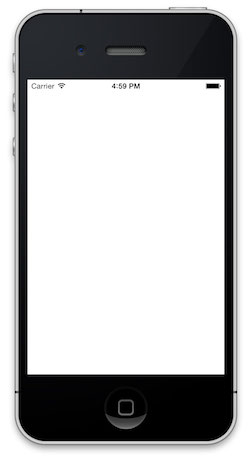
是不是看上去太白了,什么都没有.别着急,一会就添加内容进去. > 你可能注意到有一些工程在编译的时候报warning. Cocoapods的工程可能是由很多不同的开发者导入的,不同的开发者对待warning会有不同的容错.大多数时候你可以忽略一些warning.只需要保证没有编译error出现!
3.创建你的主要视图控制器(ViewController)
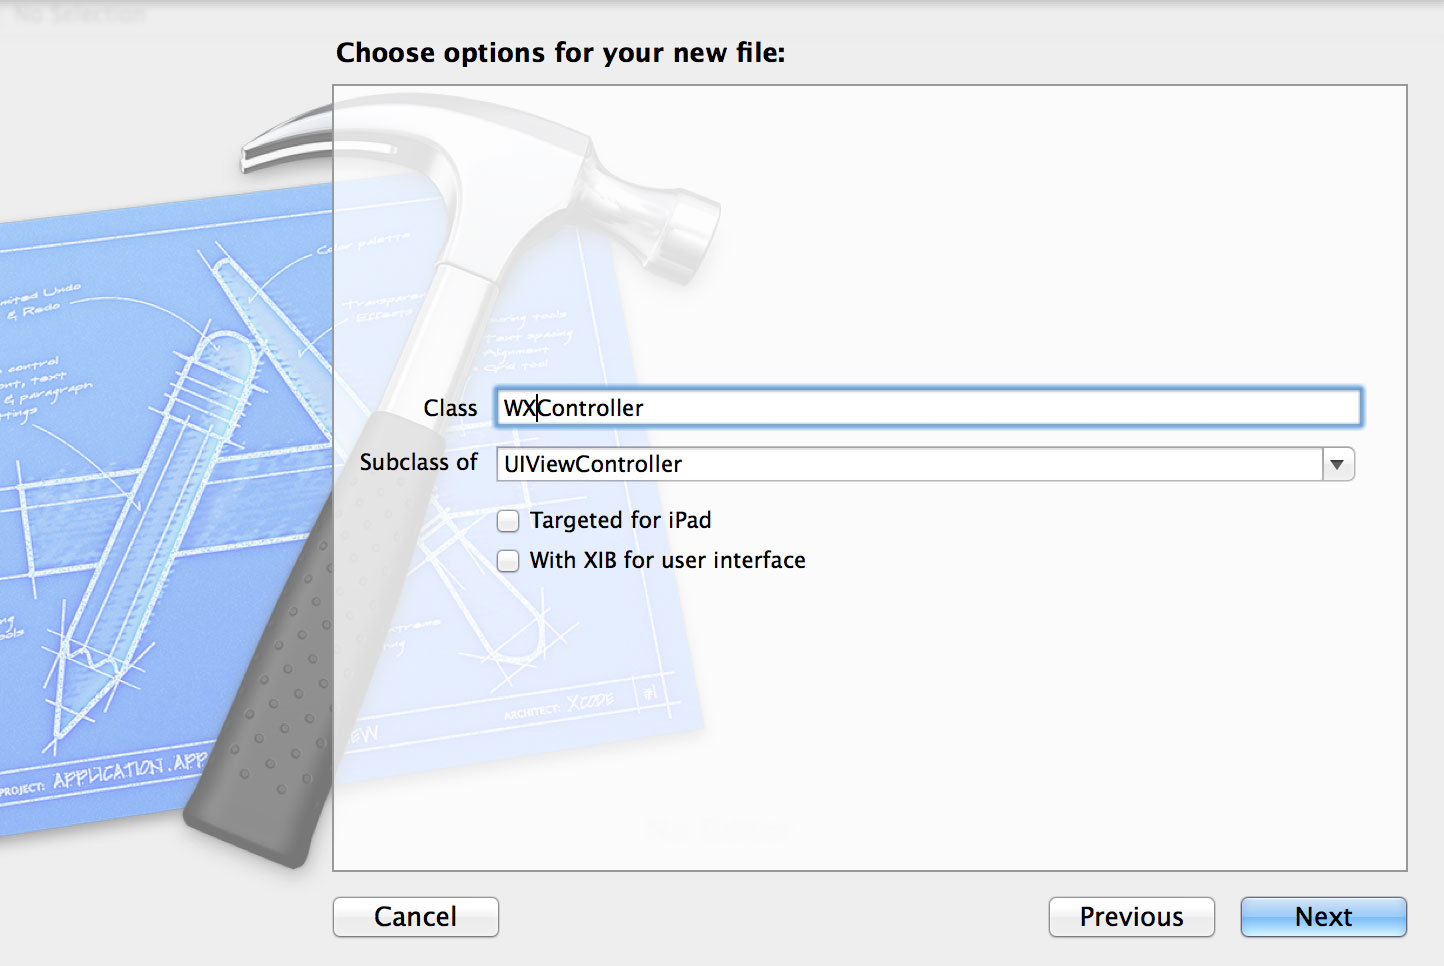
虽然这个APP看上去很复杂,但是依然可以用简单的几个ViewController来完成.现在就开始来添加(ViewController). 确认选择的是 SimpleWeather ,然后依次点击File\New\File,选择 Cocoa Touch\Objective-C class. 命名为: WXController ,继承于 UIViewController. 确保Targeted for iPad和 With XIB for user interface都没有被选中:
打开WXController.m并替换-viewDidLoad方法为下面的代码:
- (void)viewDidLoad {
    [super viewDidLoad];

    // Remove this later
    self.view.backgroundColor = [UIColor redColor];
}现在打开AppDelegate.m.并导入下面两个类.
#import "WXController.h"
#import <TSMessage.h>
经常玩找茬的童鞋可能注意到: WXController是被引号引用的. TSMessage是被尖括号引用的,到底有什么区别呢?
回顾之前创建Podfile的时候.我们用Cocoapods导入了TSMessage库. Cocoapods创建了TSMessage pod 工程并添加到了现在的workspace.因此你从workspace的其他工程中导入库,需要用尖括号而不是引号.
替换-application:didFinishLaunchingWithOptions:方法的内容为:
- (BOOL)application:(UIApplication *)application didFinishLaunchingWithOptions:(NSDictionary *)launchOptions {
    self.window = [[UIWindow alloc] initWithFrame:[[UIScreen mainScreen] bounds]];
    // 1
    self.window.rootViewController = [[WXController alloc] init];
    self.window.backgroundColor = [UIColor whiteColor];
    [self.window makeKeyAndVisible];
    // 2
    [TSMessage setDefaultViewController: self.window.rootViewController];
    return YES;
}
注释 1 部分 : 初始化 并设置 WXController 实例为程序的root view controller (根控制器). 但是通常情况下,是设置一个 UINavigationController 或者 UITabBarController 为 root view controller .目前这个示例你就直接设置WXController实例就行了.
注释 2 部分: 设置默认view controller (视图控制器) 来显示你的 TSMessages.当你设置完这一步后,你就不需要手动来指定哪一个控制器用来显示alerts(通知).
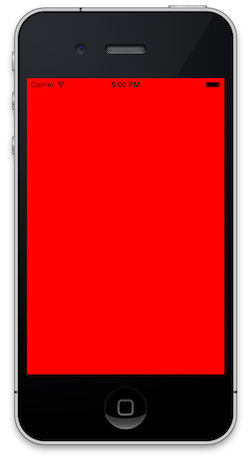
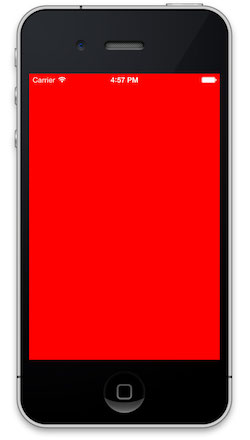
编译运行后,你会看到你的新视图背景已经变成了红色:
这个红色的背景好像让状态条有点难以看清.不过幸运的是,这儿有一个简单的办法来让状态栏更清晰一点.
那就是UIViewController 在iOS7中有一个新的API来专门控制状态栏外观. 打开WXController 并添加下面的代码 到 -viewDidLoad:方法的后面(只要在实现作用域内都可以).
- (UIStatusBarStyle)preferredStatusBarStyle {
    return UIStatusBarStyleLightContent;
}
再次编译运行后你会发现状态栏有了变化:
4. 开始设置你的APP视图
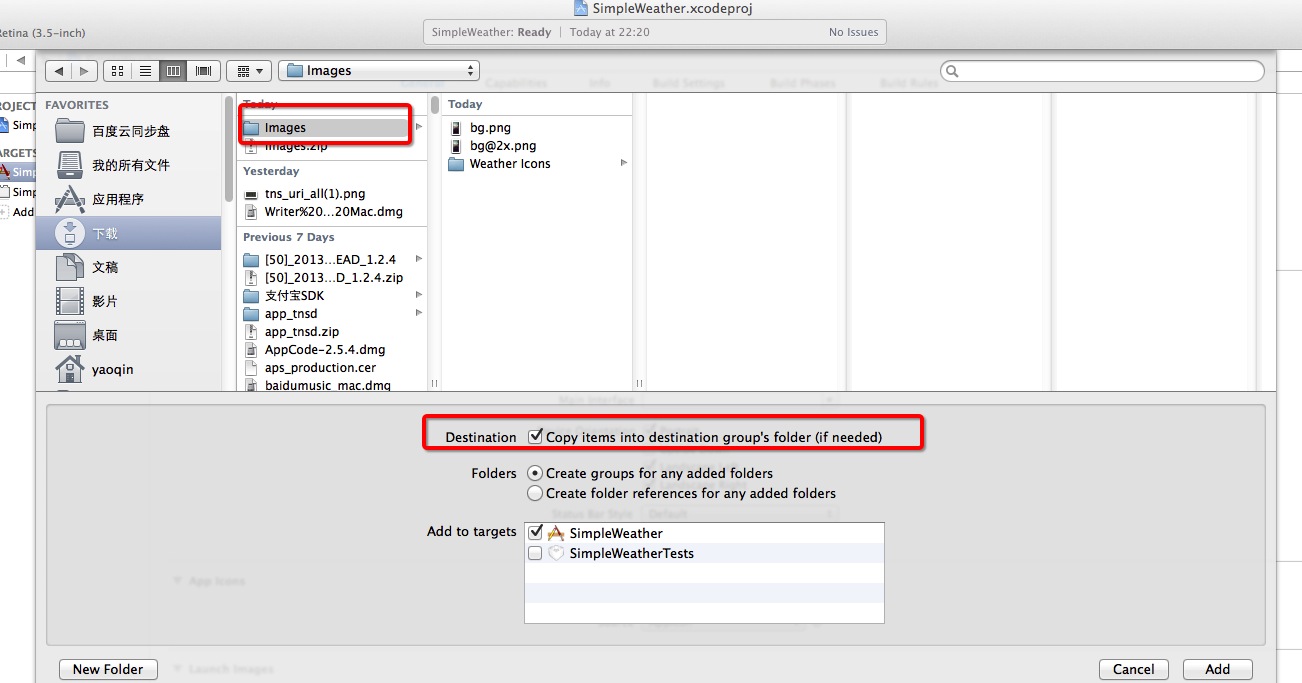
现在该让你的APP上场了.下载工程需要的这个图片,并解压到合适的位置. 这个压缩包内有一个背景图片和一些天气icon. >图片分别来自于Flickr的用户”idleformat ” 还有 Dribbble 的用户”heeyeun” >这个背景图片是San Francisco(旧金山) ,因为iPhone的模拟器默认定位在这个城市. 假如你想DIY个性化你的APP,你可以用你的家乡或者任何你选择的图片代替它.
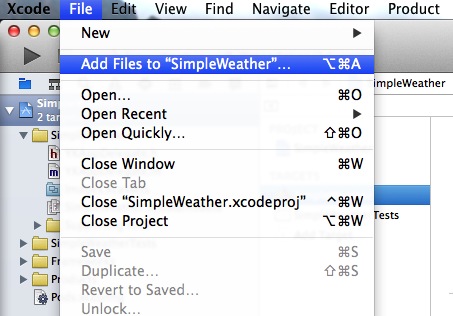
回到Xcode上..然后点击 File\Add Files to “SimpleWeather”…. 找到刚刚 Images的文件夹,并选中.并确保Copy items into destination group’s folder (if needed) 选项已经被勾选.
打开WXController.h.在 @interface那行的下面直接添加以下的delegate protocols :
<UITableViewDataSource, UITableViewDelegate, UIScrollViewDelegate>接着在打开WXController.m >画外音— Protip(人名):你可以使用快捷键Control-Command-Up来在 .h 和 .m 之间快速切换. 在WXController.m添加下面的import到顶部.
#import <LBBlurredImage/UIImageView+LBBlurredImage.h>LBBlurredImage.h包含在之前用Cocoapods导入的LBBlurredImage工程内. 我们将使用这个库来模糊我们的背景图片.
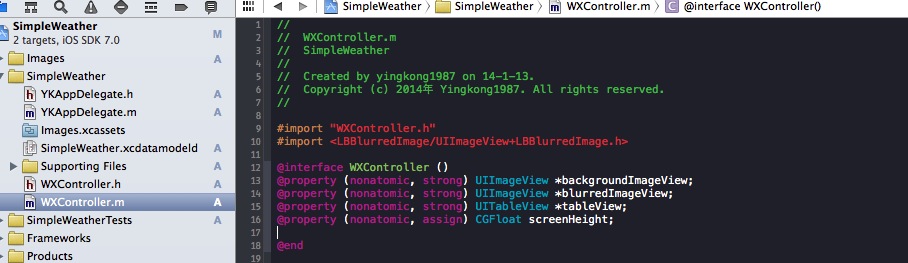
在WXController的扩展内填入下面的属性代码.
@property (nonatomic, strong) UIImageView *backgroundImageView;
@property (nonatomic, strong) UIImageView *blurredImageView;
@property (nonatomic, strong) UITableView *tableView;
@property (nonatomic, assign) CGFloat screenHeight;

@end
效果如图:
哈哈,现在就开始来建立并设置我们的视图吧..”等等” ——“IBOutlets哪去了?”
打个预防针:所有的视图我们都将使用代码实现…. >画外音somebody : what the fuck!

挺住哥们,现在还不是崩溃的时候..这有许多途径来创建一个视图,并且每个人都会有他们的喜好. 我们甚至因为哪一种风格更受人们喜爱而举行了一场在” RayWenderlich.com “ 团队 内的辩论.Storyboards, NIBs,还有纯代码都有支持者和反对者.
鉴于这个APP的视图都不是很复杂. 而且现在又是一个学习的示例.所以,我们来一起坚持用代码实现吧.
你将创建三个视图.并且他们互相叠加..效果在本文章的开头有一个GIF动图
这儿有一个你将完成的部分分解图.
>记住.table view 需要是透明的

当你滚动APP的时候你需要改变模糊图片的alpha值来提供动态模糊效果.
打开 WXController.m 并替换-viewDidLoad内代码如下,来设置背景颜色
// 1
self.screenHeight = [UIScreen mainScreen].bounds.size.height;

UIImage *background = [UIImage imageNamed:@"bg"];

// 2
self.backgroundImageView = [[UIImageView alloc] initWithImage:background];
self.backgroundImageView.contentMode = UIViewContentModeScaleAspectFill;
[self.view addSubview:self.backgroundImageView];

// 3
self.blurredImageView = [[UIImageView alloc] init];
self.blurredImageView.contentMode = UIViewContentModeScaleAspectFill;
self.blurredImageView.alpha = 0;
[self.blurredImageView setImageToBlur:background blurRadius:10 completionBlock:nil];
[self.view addSubview:self.blurredImageView];

// 4
self.tableView = [[UITableView alloc] init];
self.tableView.backgroundColor = [UIColor clearColor];
self.tableView.delegate = self;
self.tableView.dataSource = self;
self.tableView.separatorColor = [UIColor colorWithWhite:1 alpha:0.2];
self.tableView.pagingEnabled = YES;
[self.view addSubview:self.tableView];
真是相当简单的代码: 1.获取并储存屏幕高度. 等一会你会需要它的..当使用分页方式显示所有天气数据的时候.
2.创建一个静态的背景图像并添加到self.view.
3.用LBBlurredImage来创建一个模糊背景图像,并设置alpha为0.这样一开始显示的就只有backgroundImageView(背景图片)
4.创建一个tableview用来处理所有的数据展示. WXController会实现delegate 和 data source,就像实现scroll view的delegate一样.注意,你依然要设置pagingEnabled为YES.
添加下面的UITableView 的 delegate 和 data source代码到WXController.m的 @implementation 作用域内.
// 1
#pragma mark - UITableViewDataSource

// 2
- (NSInteger)numberOfSectionsInTableView:(UITableView *)tableView {
    return 2;
}

- (NSInteger)tableView:(UITableView *)tableView numberOfRowsInSection:(NSInteger)section {
    // TODO: Return count of forecast
    return 0;
}

- (UITableViewCell *)tableView:(UITableView *)tableView cellForRowAtIndexPath:(NSIndexPath *)indexPath {
    static NSString *CellIdentifier = @"CellIdentifier";
    UITableViewCell *cell = [tableView dequeueReusableCellWithIdentifier:CellIdentifier];

    if (! cell) {
        cell = [[UITableViewCell alloc] initWithStyle:UITableViewCellStyleValue1 reuseIdentifier:CellIdentifier];
    }

    // 3
    cell.selectionStyle = UITableViewCellSelectionStyleNone;
    cell.backgroundColor = [UIColor colorWithWhite:0 alpha:0.2];
    cell.textLabel.textColor = [UIColor whiteColor];
    cell.detailTextLabel.textColor = [UIColor whiteColor];

    // TODO: Setup the cell

    return cell;
}

#pragma mark - UITableViewDelegate

- (CGFloat)tableView:(UITableView *)tableView heightForRowAtIndexPath:(NSIndexPath *)indexPath {
    // TODO: Determine cell height based on screen
    return 44;
}
1.编译标记(Pragma marks)是一个管理你代码的好方法.
2. 你的table view 有两个sections,一个是每小时的天气预报,一个是每天的天气预报. numberOfSectionsInTableView 方法内固定return 2 即可.
3.预报cell是不可被选择的(不可点击). 给他们设置为半透明的黑色背景 ,还有白色文字.
使用格式化的注释”// TODO:” 可以帮助Xcode找到你需要稍后接着完成的代码位置. 你还可以使用Show Document Items (Control-6)来看到TODO条目.
最后添加下面的放到到WXController.m
- (void)viewWillLayoutSubviews {
    [super viewWillLayoutSubviews];

    CGRect bounds = self.view.bounds;

    self.backgroundImageView.frame = bounds;
    self.blurredImageView.frame = bounds;
    self.tableView.frame = bounds;
}你的试图控制器在WXController.m内调用上面的方法以便展示他的子视图.
编译运行APP来看看你的视图是如何叠加的
认真的看..你会看到有一根根的白色分割线在你的空table上. 依然在-viewDidLoad方法里面,添加下面的代码来设置你的布局框架(frames)和边距(margins):
// 1
CGRect headerFrame = [UIScreen mainScreen].bounds;
// 2
CGFloat inset = 20;
// 3
CGFloat temperatureHeight = 110;
CGFloat hiloHeight = 40;
CGFloat iconHeight = 30;
// 4
CGRect hiloFrame = CGRectMake(inset,
                              headerFrame.size.height - hiloHeight,
                              headerFrame.size.width - (2 * inset),
                              hiloHeight);

CGRect temperatureFrame = CGRectMake(inset,
                                     headerFrame.size.height - (temperatureHeight + hiloHeight),
                                     headerFrame.size.width - (2 * inset),
                                     temperatureHeight);

CGRect iconFrame = CGRectMake(inset,
                              temperatureFrame.origin.y - iconHeight,
                              iconHeight,
                              iconHeight);
// 5
CGRect conditionsFrame = iconFrame;
conditionsFrame.size.width = self.view.bounds.size.width - (((2 * inset) + iconHeight) + 10);
conditionsFrame.origin.x = iconFrame.origin.x + (iconHeight + 10);
这都是相当常用的设置代码,但是这将会发生什么: 1.设置table(列表)的header(头部)在屏幕上都为一个同样的尺寸.你会利用UITableView的分页来浏览header和每日/每小时的天气预报.
- 创建一个inset(或者起名padding)变量用来让所有的label均匀分布且居中.
3.为你各种各样的视图创建并初始化高度变量.设置这些变量的值为一个常量.如果需要的话,这样可以很容易的配置和修改你的视图设置.
4.创建以常量和inset变量为基础的label和icon视图的框架(frame)
5.拷贝icon的frame.调整下使得文本有扩展的空间,并把文档移到icon的右边.
在-viewDidLoad:中添加下面的到刚才frame代码的下面:
// 1
UIView *header = [[UIView alloc] initWithFrame:headerFrame];
header.backgroundColor = [UIColor clearColor];
self.tableView.tableHeaderView = header;
// 2
// bottom left
UILabel *temperatureLabel = [[UILabel alloc] initWithFrame:temperatureFrame];
temperatureLabel.backgroundColor = [UIColor clearColor];
temperatureLabel.textColor = [UIColor whiteColor];
temperatureLabel.text = @"0°";
temperatureLabel.font = [UIFont fontWithName:@"HelveticaNeue-UltraLight" size:120];
[header addSubview:temperatureLabel];
// bottom left
UILabel *hiloLabel = [[UILabel alloc] initWithFrame:hiloFrame];
hiloLabel.backgroundColor = [UIColor clearColor];
hiloLabel.textColor = [UIColor whiteColor];
hiloLabel.text = @"0° / 0°";
hiloLabel.font = [UIFont fontWithName:@"HelveticaNeue-Light" size:28];
[header addSubview:hiloLabel];
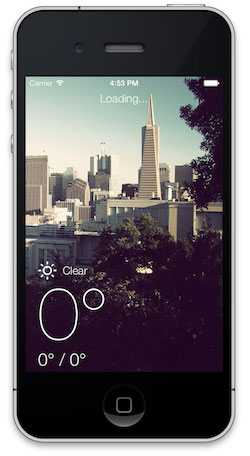
// top
UILabel *cityLabel = [[UILabel alloc] initWithFrame:CGRectMake(0, 20, self.view.bounds.size.width, 30)];
cityLabel.backgroundColor = [UIColor clearColor];
cityLabel.textColor = [UIColor whiteColor];
cityLabel.text = @"Loading...";
cityLabel.font = [UIFont fontWithName:@"HelveticaNeue-Light" size:18];
cityLabel.textAlignment = NSTextAlignmentCenter;
[header addSubview:cityLabel];
UILabel *conditionsLabel = [[UILabel alloc] initWithFrame:conditionsFrame];
conditionsLabel.backgroundColor = [UIColor clearColor];
conditionsLabel.font = [UIFont fontWithName:@"HelveticaNeue-Light" size:18];
conditionsLabel.textColor = [UIColor whiteColor];
[header addSubview:conditionsLabel];
// 3
// bottom left
UIImageView *iconView = [[UIImageView alloc] initWithFrame:iconFrame];
iconView.contentMode = UIViewContentModeScaleAspectFit;
iconView.backgroundColor = [UIColor clearColor];
[header addSubview:iconView];这是一个很大块的代码.但是他承担着非常重要的角色.就是在试图内设置各种各样的控制.总而言之:
1.设置当前情况视图到你的table header(表格头部).
2.构建显示天气数据所需要的每一个label.
3.添加一个image view (图像视图) 来展示天气icon.

试试滑动表格,会看到它的弹力效果.
检索天气数据
你可能注意到了.APP上面显示了一个”loading” .但是其实并没有真的在做什么事情.是时候去获取一些真实的天气状况了.
我们将从OpenWeatherMap API 获取天气数据. OpenWeatherMap 是一个相当了不起的服务..目标是为了任何人提供实时的,精确的并且是免费的天气数据. 开放了很多的天气API接口.但是大部分接口要么是使用了像XML这样的旧数据格式,要么提供有偿服务—有时候还挺贵.
你将跟着下面的基本步骤来获取你设备位置的天气数据: 1.找到你设备的所在位置.
2.从API 端下载JSON数据
3.映射JSON到WXCondition 和 WXDailyForecast.
4.告诉UI我们有新数据来了~
开始创建我们的天气model和数据管理class.点击File\New\File… 并选择 Cocoa Touch\Objective-C class,命名为WXClient并继承与NSObject.重复三次上述步骤来创建下面的类.
WXManager继承与NSObject
WXCondition继承与MTLModel
WXDailyForecast继承与WXCondition
都完成了吗?现在开始进入下一个环节.关于映射和天气数据转换.
创建天气model
这个model使用 Mantle 来创建,它可以轻松的映射数据和值的转换.
打开WXCondition.h并修改interface为下面的样子:
// 1
@interface WXCondition : MTLModel <MTLJSONSerializing>

// 2
@property (nonatomic, strong) NSDate *date;
@property (nonatomic, strong) NSNumber *humidity;
@property (nonatomic, strong) NSNumber *temperature;
@property (nonatomic, strong) NSNumber *tempHigh;
@property (nonatomic, strong) NSNumber *tempLow;
@property (nonatomic, strong) NSString *locationName;
@property (nonatomic, strong) NSDate *sunrise;
@property (nonatomic, strong) NSDate *sunset;
@property (nonatomic, strong) NSString *conditionDescription;
@property (nonatomic, strong) NSString *condition;
@property (nonatomic, strong) NSNumber *windBearing;
@property (nonatomic, strong) NSNumber *windSpeed;
@property (nonatomic, strong) NSString *icon;

// 3
- (NSString *)imageName;

@end
又一次见到了这么多的设置代码,看到这些数字注释了吗,你会了解如下: 1.MTLJSONSerializing协议告诉这个Mantle序列化器,这个对象已经说明怎么去映射JSON到Objective-C属性. 2.这儿有所有天气的数据属性.你将使用其中的一些.但是假如你想一段时间后扩展你的APP,使用所有的数据会更好. 3.这只是一个简单的辅助方法来使天气状态映射成图像文件.
编译并运行APP….然后…然后失败了…你能猜到为什么吗? 这样给你一个小提示吧,假如你需要帮助的话:
我们没有从Cocoapods工程中导入Mantle. 替换WXCondition.h头部的#import "MTLModel.h为下面的
#import <Mantle.h>编译运行后;成功了.你会看到几个新的warnings,不过现在你可以先忽略他们.
首先我们先实现-imageName方法.
打开WXCondition.m并添加下面的方法:
+ (NSDictionary *)imageMap {
    // 1
    static NSDictionary *_imageMap = nil;
    if (! _imageMap) {
        // 2
        _imageMap = @{
                      @"01d" : @"weather-clear",
                      @"02d" : @"weather-few",
                      @"03d" : @"weather-few",
                      @"04d" : @"weather-broken",
                      @"09d" : @"weather-shower",
                      @"10d" : @"weather-rain",
                      @"11d" : @"weather-tstorm",
                      @"13d" : @"weather-snow",
                      @"50d" : @"weather-mist",
                      @"01n" : @"weather-moon",
                      @"02n" : @"weather-few-night",
                      @"03n" : @"weather-few-night",
                      @"04n" : @"weather-broken",
                      @"09n" : @"weather-shower",
                      @"10n" : @"weather-rain-night",
                      @"11n" : @"weather-tstorm",
                      @"13n" : @"weather-snow",
                      @"50n" : @"weather-mist",
                      };
    }
    return _imageMap;
}

// 3
- (NSString *)imageName {
    return [WXCondition imageMap][self.icon];
}
上面的代码是做什么的呢? 1.构建一个静态字典,因为每个WXCondition实例将使用一样的数据映射. 2.映射这个天气状态的代码到图片文件 (e.g. “01d” 对应 “weather-clear.png”). 3.声明公共消息来获取图像文件的名称. 你能找到一个OpenWeatherMap支持的所有天气状态列表在这儿
看一下下面 扼要的OpenWeatherMap返回的JSON例子:
{
    "dt": 1384279857,
    "id": 5391959,
    "main": {
        "humidity": 69,
        "pressure": 1025,
        "temp": 62.29,
        "temp_max": 69.01,
        "temp_min": 57.2
    },
    "name": "San Francisco",
    "weather": [
        {
            "description": "haze",
            "icon": "50d",
            "id": 721,
            "main": "Haze"
        }
    ]
}你需要映射嵌套的JSON数据为OC属性.嵌套JSON中的元素,比如温度,你可以看到,他是在main的成员中.
要做到这一点,你需要利用OC的 KVC 和 Mantle的 MTLJSONAdapter.仍然在WXCondition.m里面,通过添加MTLJSONSerializing协议所必须的JSONKeyPathsByPropertyKey方法来设置”JSON到Model属性”映射 .
+ (NSDictionary *)JSONKeyPathsByPropertyKey {
    return @{
             @"date": @"dt",
             @"locationName": @"name",
             @"humidity": @"main.humidity",
             @"temperature": @"main.temp",
             @"tempHigh": @"main.temp_max",
             @"tempLow": @"main.temp_min",
             @"sunrise": @"sys.sunrise",
             @"sunset": @"sys.sunset",
             @"conditionDescription": @"weather.description",
             @"condition": @"weather.main",
             @"icon": @"weather.icon",
             @"windBearing": @"wind.deg",
             @"windSpeed": @"wind.speed"
             };
}假如这样,当这个字典的值是这个JSON的keypath时,这个字典的key是WXCondition属性的名称.
你可能已经注意到,关于JSON数据转化为OC属性时,有一个明显的问题. 时间的OC属性类型是NSDate,但是JSON是一个NSInteger存储的 Unix time . 你需要用某种方式来在他们两个之间进行转换.
Mantle正好有解决这个问题的特性:MTLValueTransformer这个类可以让你声明一个block来具体让你如何转换一个值.
Mantle的转换语法使用起来有一点点奇怪.创建一个指定属性的转换,就是你添加一个以属性名字开头并以JSONTransformer结尾的类方法.
下面是用来转换NSDate属性到WXCondition.m.
+ (NSValueTransformer *)dateJSONTransformer {
    // 1
    return [MTLValueTransformer reversibleTransformerWithForwardBlock:^(NSString *str) {
        return [NSDate dateWithTimeIntervalSince1970:str.floatValue];
    } reverseBlock:^(NSDate *date) {
        return [NSString stringWithFormat:@"%f",[date timeIntervalSince1970]];
    }];
}

// 2
+ (NSValueTransformer *)sunriseJSONTransformer {
    return [self dateJSONTransformer];
}

+ (NSValueTransformer *)sunsetJSONTransformer {
    return [self dateJSONTransformer];
}
这里是上面的转换如何工作的:
1.你使用block转换Objective-C属性和值后返回一个MTLValueTransformer
2.你仅仅只需要详细实现Unix time和NSDate的转换一次.这样就可以一直重用dateJSONTransformer了.
下一个值转换起来有一点让人烦恼.但是这仅仅是由于使用OpenWeatherMap的API和他的JSON返回格式.这个天气key是一个JSON的数组,但是你仅仅只关心一个天气条件.
在WXCondition.m内使用像dateJSONTransformer一样的结构,你可以创建一个NSArray和NSString的转换吗?解决的办法就在下面:
+ (NSValueTransformer *)conditionDescriptionJSONTransformer {
    return [MTLValueTransformer reversibleTransformerWithForwardBlock:^(NSArray *values) {
        return [values firstObject];
    } reverseBlock:^(NSString *str) {
        return @[str];
    }];
}

+ (NSValueTransformer *)conditionJSONTransformer {
    return [self conditionDescriptionJSONTransformer];
}

+ (NSValueTransformer *)iconJSONTransformer {
    return [self conditionDescriptionJSONTransformer];
}
最后的转换只是一个形式. OpenWeatherAPI 使用的是 m/s 的风速单位,但是你的app 是使用英制系统,你需要将它转成m/s
添加下面的转换方法和宏定义到你WXCondition.m的实现作用域(implementation{})里面.
#define MPS_TO_MPH 2.23694f

+ (NSValueTransformer *)windSpeedJSONTransformer {
    return [MTLValueTransformer reversibleTransformerWithForwardBlock:^(NSNumber *num) {
        return @(num.floatValue*MPS_TO_MPH);
    } reverseBlock:^(NSNumber *speed) {
        return @(speed.floatValue/MPS_TO_MPH);
    }];
}
这儿有一个OpenWeatherMap API 的小差异需要你处理下.看到位于 current conditions response 和 daily forecast response 之间的温度部分.
// current
"main": {
    "grnd_level": 1021.87,
    "humidity": 64,
    "pressure": 1021.87,
    "sea_level": 1030.6,
    "temp": 58.09,
    "temp_max": 58.09,
    "temp_min": 58.09
}

// daily forecast
"temp": {
    "day": 58.14,
    "eve": 58.14,
    "max": 58.14,
    "min": 57.18,
    "morn": 58.14,
    "night": 57.18
}
当前天气的第一个key 是 main , 最高气温保存于key为temp_max的键值对中.预测天气的第一个key是temp,最高温的存储key是max;
除了温度的key有区别外,其他的也都是这样.所以你需要做的就更换每日天气的映射key.
打开WXDailyForecast.m并且覆写+JSONKeyPathsByPropertyKey 如下:
+ (NSDictionary *)JSONKeyPathsByPropertyKey {
    // 1
    NSMutableDictionary *paths = [[super JSONKeyPathsByPropertyKey] mutableCopy];
    // 2
    paths[@"tempHigh"] = @"temp.max";
    paths[@"tempLow"] = @"temp.min";
    // 3
    return paths;
}
注意,这样也将把WXCondition’s的方法覆盖了.上面的方法可以概括为: 1.获取 WXCondition的映射并创建它的一个可变的拷贝. 2.修改你每日预报所需的最高和最低(气温)的key映射. 3.返回新的映射.
编译运行APP;从上一次运行以来还没有看到任何新东西,但是这是一个很好去检查编译运行时有没有error的位置.
本章节教程仅供学习使用
英文原版地址:http://www.raywenderlich.com/55384/ios-7-best-practices-part-1,版权归其所有
翻译纯属学习兴趣,如果侵权,请联系我马上删除.